Sunday, July 29, 2012

Pickled Corn

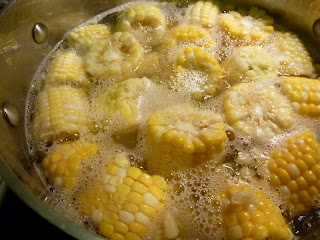
You had to know this was coming.  When I read the recipe in the August edition of Bon Appetit, I had to try it.  Especially since Colorado sweet corn is making it's way to the farmer's markets.  This is a week long process, but worth the effort.  My waiting was over today, and I had my first taste.  Wow, these juicy corn kernels were bursting with flavor.  Lightly pickled with garlic flavor and a slight kick from the jalapeno, nothing too crazy or mouth burning.  It's great that they'll keep for up to 3 weeks in the refrigerator.
Pickled Corn
Makes 12 servings
6 ears of corn, husked, cut crosswise into 1 1/2" rounds
5 1/2 Tb kosher salt plus more
10 garlic cloves
2 red chiles, cut crosswise into thin rounds, seeded
1 tsp whole black peppercorns
Cook corn in a large pot of lightly salted boiling water until crisp-tender, about 4 minutes.  Using a slotted spoon, transfer to a bowl of ice water.  Let cool, drain.
Layer corn, garlic, chiles, and peppercorns in a 4 qt glass or ceramic jar.
Stir 5 1/2 Tb salt and 2 quarts water in a large bowl until salt is dissolved, and  pour over corn mixture.  Make sure corn is submerged, weigh them down with plates if you need to.  Cover jar with plastic wrap or a lid and let stand in a dark, cool place for 4 days to pickle.  A room temperature of 68-70 is ideal. 
Taste the corn after 4 days, if you want more pucker, let it sit for another day or two.  Then serve or refrigerate for up to 3 weeks.
Notes:  I used green jalapenos instead.  Knowing that we like things a little spicy I didn't even taste the corn at four days,  I just let it continue to pickle for the week.  That was perfect, I wouldn't change a thing.

Friday, July 27, 2012

Flowers, food and bunnies

Everyday begins as a new page in a book, in the garden.  So much can change in 24 hours.  With the short six month window my plants have to grow, they give it their all every day.
Let me lead you down the garden path.....
With Hops on the left, two pots of Basil on the right, Sunflowers brighten the way.
This American Gold Finch continues to frequent the yard and is welcome to all the seeds he can take.
The Garden Phlox is coming into full bloom right now.
Pulled these Beets, Dragon's Egg and Marketmore cucumbers this morning.
Every garden needs some Black Eyed Susan's, don't you think?
Red cabbage is planted in the flower beds, wish they'd hurry up and grow.
Although I haven't seen any damage yet, my nemesis is still getting into the back yard.  He does not appear timid or afraid, as I watch from three feet away while he munches on green grass.  That doesn't mean I trust him, I still need to post a sign-- NO CUTE BUNNIES ALLOWED.

Sunday, July 22, 2012

Hydrangea, Liatris and Shastas

I don't think my hydrangea would make it through the winter so I bring the pot in every year.  Two years ago, after reading an article on how to over winter the hydrangea,  I cut back all of the plant and let it sit in the garage.  It grew a lot of foliage the following summer, but didn't bloom.  Last fall, after reading another article that stated hydrangeas only bloom on old wood, similar to lilacs, I brought it inside and didn't cut anything off, just let the leaves drop on their own.  You be the judge.  I think I read some bad advice the first time.
A welcome sight and easy perennial, Shasta daisies fill in the back edge of the front sloping flower bed.
The Liatris are starting to bloom.  I think it's odd how they start opening at the top of the feather and work their way down.  It's also known as Blazing Star or Prairie Gay Feather, a perennial grown mostly for it's purple flower.
We just planted this peach tree last summer.  It's got more peaches than branches.  I can't imagine how this little skinny tree is sustaining  and feeding 6 dozen peaches.

I guess we'll find out soon enough.


Friday, July 20, 2012

Farro Salad

Farro and Wheatberries are my favorite grains.  Well, then there's Quinoa too, but I don't think that's considered to be a grain.  Anyway, I usually make a grain salad with one of these every other week, so that I have it in the refrigerator.  This farro salad is from Heidi Krahling's book, Insalata's Mediterranean Table.


Cook the farro first, this can even be made a day ahead.

1/2 C Extra virgin olive oil
2 C pearled farro
1 C minced yellow onion
2 1/2C hot water
1 tsp. kosher salt
In a medium saucepan, heat the oil over medium-high heat.  Reduce the heat to low; add the farro and onion.  Cook on low, stirring occasionally, until the farro grains are coated with oil, toasted, fragrant and uniformly brown, 20 minutes.  Add the water and salt; bring to a boil.  Reduce the heat to low; cover with a tight-fitting lid and cook until just tender, 40 minutes.  Remove from the heat; allow to sit, covered, 20 minutes.
For the farro salad:  Chop everything while the farro is cooking and you're ready to eat when the farro is done.
In a large bowl, combine the cooked farro
1/2 C walnuts, toasted and chopped
1/2 C minced green onion
1/2C sun-dried tomatoes packed in oil, julienned
1/2 C picholine olives, pitted and coarsely chopped
1/2 C chopped Italian parsley
1 tsp. kosher salt
1/4 tsp. freshly ground black pepper
Mix well.  Drizzle with extra olive oil if you think it needs it.  Taste and adjust the seasonings.  Serve at room temperature.  
Makes about 7 Cups

Notes: Given what I have on hand at the time, I've made this with different olives, kalamata or regular green olives, and it tastes great both ways.  I typically cook the farro and make the salad the same day.  Be forewarned, it's addicting.

Thursday, July 19, 2012

Flavored Mayonnaise

Have you ever tried making flavored homemade mayonnaise?  I found a recipe on The David Blahg for Milk Mayonnaise that was posted over two years ago.  Where have I been?  He writes about the secrets and science behind milk mayonnaise.  It only takes five minutes to make.

Milk Mayonnaise
makes 1 Cup
1/3 cup very cold milk
3/4 teaspoon fresh lemon juice
1 small garlic clove, peeled
1/8 teaspoon freshly ground white pepper
About 3/4 cup vegetable oil, or 1/2 cup vegetable oil plus 1/4 cup olive oil
Kosher salt
Directions:
Combine the milk, lemon juice, garlic, and pepper in a 2-cup glass measuring cup.  Using a handheld blender, buzz on high for 30 seconds until frothy.  With the motor running on high, slowly pour in the oil a few drops at a time, and gradually increase this to a fine thread, moving the blender up and down, until the mixture thickens lusciously and resembles a soft mayonnaise. You may need more or less oil.  Season with salt to taste.  The mayonnaise will last atleast 1 week in the fridge.

Now comes the fun part.  To get you started with other flavors, David gives several other variations.  I've made both the Cilantro/Ginger and the Tomato mayonnaise.  I think they are delicious.  We make a lot of panini sandwiches at our house, and these flavored mayo's are a perfect addition.  One of my most favorite ways to spice regular mayonnaise is to add Sriracha.  Just add a little at a time, until you've got the heat that you want. 
Cilantro and Ginger Mayonnaise
Add 1 loosely packed cup of well-dried fresh cilantro leaves and tendril-soft stems and a 1 1/2-inch peeled and grated thumb of fresh ginger to the cup along with the milk, 1 3/4 teaspoons of lemon juice, and the pepper.  Omit the garlic.  Whir in the oil as directed above.  Stir in 1 scallion cut into thin slices on the diagonal.
Anchovy Mayonnaise
Add 6 anchovy fillets (generous 1 tablespoon) packed in oil to the cup along with the milk, lemon juice, garlic, and pepper.  Whir in the oil as directed above.  Omit the salt.
Curry Mayonnaise
Add 2 teaspoons of your favorite curry powder to the cup along with the milk, lemon juice, garlic, and pepper.  Whir in the oil as directed above.  Before using, let this sit for an hour or so in the fridge to bloom.
Tomato Mayonnaise
Add 1 1/2 tablespoons of double-concentrate tomato paste to the cup along with the milk, garlic, and pepper.  Omit the lemon juice.  Whir in the oil as directed above.  Stir in 1 tablespoon minced oil-packed sun-dried tomatoes.

Tuesday, July 17, 2012

More garden delights

I finally pulled all my lettuces in order to make room for the Leeks to grow.  Red Sails and Grand Rapids lettuces are both very slow to bolt, so I feel fortunate that they were able to produce this far into July.  In another couple of months, when our temperature cools down, I'll plant more seeds.
The markings on these Green Zebra tomatoes are so unusual.  This is my first year growing them, so I'm anxious for them to ripen.
We put this spaghetti squash at the base of a vertical growing space.  It climbed up the trellis and now is attached to one of the branches on the Blue Spruce.  I tied the squash around the branch so it's weight won't drag the squash vine down.
Here's another first for this year:  the Dragons Egg cucumber.  I bought the seeds from Baker Creek last year, but it was too late in the summer to start them.  Kinda funny looking, hope they taste good.
The latest addition to our potted foods is a bay leaf tree.  One day my husband mentioned  that it might be nice to pick fresh bay leaves as we need them.  That's all I needed to hear; a few days later I found a Bay Laurel at the local nursery.  I'm pleased they do well in pots.
In the fall, the bay leaf tree will come inside along with the citrus trees so they can over winter in the sun room.

Monday, July 16, 2012

Honey Ginger BBQ Sauce

While looking for something different, I came upon this sweet and tangy sauce by Alexis Touchet, published in Gourmet Live on 6/27/2012.  It was designed to be used for their grilled shrimp and grilled corn recipes, as part of a new twist for a Fourth of July cookout, so that's what I did.  Both the shrimp and the corn were delicious.  While I know that sweet corn doesn't need a sauce, it's nice to change it up once in a while.
 
Honey-Ginger Barbecue Sauce
Makes 1 1/4 cups
Active time: 15 min
Total time: 35 min

 
1 1/2 cups apple cider vinegar
1/2 cup mild honey
1/2 cup ketchup
1 1/2 tablespoons hot sauce, such as Tabasco
4 large garlic cloves, minced
2 tablespoons minced peeled ginger
1 teaspoon salt 
Stir together all sauce ingredients in a 2 quart heavy saucepan and briskly simmer, uncovered, stirring occasionally, until thickened and reduced to about 1 1/4 cups, 25 to 30 minutes. (Stir frequently toward end of cooking to prevent sticking.)
Sauce can be made 3 days ahead and refrigerated once cooled.  Also can be doubled.  Reheat before using.
Notes: I used Sriracha in place of TabascoJust like they said, it was sweet and tangy, and I loved it on the shrimp.

Sunday, July 15, 2012

Smoked Boston Butt

Just came home from our volunteer weekend to spruce up one of the 10th Mountain Huts for the winter travelers.  We took along an 8 lb smoked Boston butt and two butterflied whole chickens to share with others.
Our favorite Memphis Dry Rub comes from Steven Raichlen's BBQ USA Cookbook.  We make a double batch of this seasoning at a time, and keep it in an airtight container in the pantry.
Ingredients: 
3 Tb sweet paprika
3 Tb pure chile powder
1 Tb salt
2 tsp freshly ground black pepper
2 tsp garlic powder
2 tsp onion powder
2 tsp dried thyme
2 tsp dried oregano
2 tsp yellow mustard seeds
1 tsp ground coriander
1 tsp celery seed
1 tsp cayenne pepper
Place all ingredients in a large bowl and mix well to blend.  Store  the rub in an airtight jar away from heat and light at room temperature.  It will keep for at least 6 months.
Makes 3/4 cup.
For the chickens we cut out the backbone on each, then butterflied them  so the great smoky flavor could better permeate the meat.  They didn't get the dry rub treatment, just a little salt and pepper.  We smoked all of this at home several days before the trip, then vacuum sealed it all and into the freezer they went.
I also made a new BBQ sauce that I found on the Food52 blog.  It's called 'Dead Guy Sauce'.  Before you ask, I'll tell you that there is no explanation as to why it's named that.  After the pork was pulled apart we bathed it in this sauce, and it was delicious.
Dead Guy Sauce
makes about 2 Cups once reduced
3 C apple cider vinegar
2/3 C brown sugar
2/3 C ketchup
1 tsp onion powder
1 tsp salt
1 tsp ground fresh pepper
1 tsp Worcestershire sauce
1 tsp Tabasco - I used Sriracha instead
Combine all ingredients in a saucepan and simmer for about half hour, whisking periodically, until the sauce just begins to thicken. Serve immediately, or reserve in the refrigerator and reheat.  I needed to simmer it for twice the amount of time, but it was worth it. 

Thursday, July 12, 2012

Black Swallowtail Caterpillar

While I was wandering in the yard taking pictures, I found this caterpillar on the Bronze Fennel.   

Of course that's the reason I planted the fennel in the first place, and the dill and several other herbs.  In hopes of attracting the Black Swallow Butterfly so she would choose that plant to feed her young.  I must say he's quite the eater, but that's okay, it's all for him.  I wonder if there will be more?

The Purple Cone Flower is another plant they love. 
Last year I found and had to have this new coneflower,  I believe it's Red Salsa.
I know this is odd and hard to believe, it is for me anyway, but my Wisteria is blooming again.  Maybe it's due to global warming, but whatever the reason for the onset of more blooms, I'm very pleased.

Wednesday, July 11, 2012

Fusilli with Roasted Red Pepper Cream

I'm taking advantage of my local farmers markets abundance of fresh red peppers.  Similar to my 'corn project', but not nearly as time consuming or messy.
Char the red peppers on all sides, then place them in a ziploc bag and seal for 15 minutes.  Let them cool enough to handle, and the charred outer skins will peel right off.
It's okay if little bits of the charred skin remain on the peeled peppers.
Now you remove the top center core along with all the seeds and veins.
Working in batches and 2 dozen red peppers later, I had 4 vacuumed sealed bags to freeze as well as several peppers to use for dinner.
There are so many great pasta recipes in this cookbook by Janet Fletcher that highlight seasonal vegetables.  Having everything else on hand, now that the peppers are done, this is what's for dinner tonight. 

Fusilli with Roasted Red Pepper Cream

Ingredients:
1 Tb olive oil 
3 oz pancetta, minced 
2/3 cup minced yellow onion 
2 large cloves garlic, minced 
2 large, heavy red bell peppers, roasted, peeled, seeded and diced
1 C chicken stock 
¼ C heavy cream 
Salt and cayenne pepper 
1 pound dried fusilli 
1 C freshly grated Parmesan cheese 
2 Tb minced parsley
Heat olive oil and pancetta in a 12" skillet over moderately low heat.  Cook, stirring occasionally, until pancetta begins to crisp, 3 to 5 minutes.  Add onion and saute until softened, about 10 minutes.  
Add garlic and saute 1 minute. 
Add bell pepper, stock and cream and bring to a simmer.  
Reduce heat to low and simmer 5 minutes.  
Puree sauce in a food processor until almost completely smooth.  
Return to skillet and season with salt and cayenne to taste.  
Just before pasta is ready, reheat gently.  
Cook pasta in a large pot of boiling salted water until al dente.  
Drain, reserving 1/2 cup of the cooking water.  
Transfer pasta to a large bowl.  
Add sauce and toss to coat.  
Add 1/2 cup of the Parmesan and toss again, adding as much of the reserved water as needed to help the sauce coat the noodles nicely.  Serve immediately, topping each serving with some of the remaining 1/2  cup Parmesan and the parsley.  Serves 4. 
Notes:  Hold back a little when saucing the pasta to make sure you need it all.  This sauce had great body and depth of flavor.  I'm thinking sauteed portabella mushrooms would be great in this dish.

Tuesday, July 10, 2012

Zucchini Fritters & Green Goddess Dressing

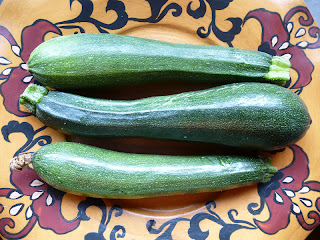
Zucchini season is here, so we need to think of more ways to use them, otherwise we're going to have to start leaving them on our neighbors front porch after they've gone to bed. 
 
As much as I enjoy my Corn-basil fritters I wanted to find a zucchini fritter recipe.  After searching, I came up with Tender Zucchini Fritters and Green Goddess Dressing from Bon Appetit, just loaded with fresh flavors.
For the dressing:
1 cup mayonnaise
1/4 cup chopped fresh dill or 1Tb dried
1/4 cup chopped fresh chives or green scallions
2 tablespoons chopped fresh tarragon or 1 tsp dried
2 tablespoons chopped fresh flat leaf parsley
1 tablespoon distilled white vinegar
1 anchovy fillet, chopped
Blend all ingredients in processor until smooth, occasionally scraping down sides of bowl.  Season dressing with salt and pepper.  Transfer to small bowl.  Cover; chill.  This can be made the day ahead and that's exactly what I didOn a side note, I doubled the amount of parsley and added 2 Tb of fresh chopped basil.  This dressing was outstanding.
 
For the fritters:
1 1/2 pounds medium zucchini, trimmed
1 1/2 teaspoons coarse kosher salt, divided
6 1/2 tablespoons all purpose flour
1/2 teaspoon baking powder
1/2 teaspoon freshly ground black pepper
1/4 cup beer
4 oz goat cheese, coarsely crumbled (about 1 cup)
1/3 cup (or more) extra-virgin olive oil 
Using large holes on box grater, coarsely grate zucchini into large colander.  Sprinkle 1 teaspoon coarse salt over and toss to coat evenly. Place colander over large bowl.  Let zucchini stand 30 minutes, tossing occasionally.  Press on zucchini to release as much liquid as possible. Empty zucchini into kitchen towel.  Roll up to enclose and squeeze dry.
Whisk flour, baking powder, 1/2 teaspoon pepper, and 1/2 teaspoon coarse salt in medium bowl to blend.  Mix in beer.  Scrape zucchini from towel into bowl; stir to coat evenly (batter will be thick).  Mix in cheese.
Heat 1/3 cup oil in heavy large skillet over medium heat until very hot, about 2 minutes.  Working in batches, drop batter into skillet by 1/4 cupfuls, flattening to 3-inch rounds.  Saute until brown and cooked through, 4 to 5 minutes per side.  Repeat with remaining batter, adding more oil as needed.  To serve, place a good size dollop of dressing in the center of your fritter, and enjoy.
Notes:  These were cooked on the grill, and while they tasted good, they weren't as crispy as I would have liked.  Next time I'll do them with canola oil in a cast iron skillet on the stove top.  

Monday, July 9, 2012

More yard guests

We do see a lot of wildlife even being in a suburban area, but on the other hand we grow many of the plants that attract wildlife.  There was a dark green hummingbird flitting about the larkspur yesterday.
This blue jay was sitting on the cross arms for the tomato cages.  Even if you don't care for blue jays, you must appreciate their vibrant colors.
The Harrier is a silent flyer.  Here he is sitting on the back fence.  
This robin came back with a worm for one of her little ones.  She has had a busy couple of months, as this is her second full nest this season.
With four consecutive and much welcomed days of rain, there are plenty of worms out and about for her to choose from.
As cute as this little guy is, he causes me to shudder.  Having 17 tomato plants, a wide variety of peppers, cucumbers, winter and summer squash, eggplant, leeks, lettuces, kale, and berries, I dropped everything and came running when my husband said "there's a rabbit in the garden."   As he exited from the danger zone I discovered the point of entry and can assure you that small gauge chicken wire was installed to secure the border as quickly as possible.